NOTE : These procedures should be performed only by a qualified Vulcan-Hart service representative.
STANDARD OVEN
Although the unit thermostats are factory positioned to their proper setting, it is not unusual for the thermostat to be knocked out of adjustment during shipment. If the oven or griddle heat response seems to be lacking after burner air shutter adjustments have been checked, perform the following adjustments.
NOTE : There are two possible conditions of the thermostat that must be checked: bypass adjustment and temperature calibration.
Bypass Adjustment
TOOLS REQUIRED : Thermometer test instrument (not of bi-metal or mercury type), standard flat blade screwdriver.
WARNING : DO NOT USE BI-METAL OR MERCURY THERMOMETERS WHEN TESTING FOOD EQUIPMENT OR PRODUCTS. CHEMICALS WITHIN THESE INSTRUMENTS MAY BE TOXIC IF EXPOSED TO FOOD.
1. Using a test instrument or thermometer, check the oven or griddle temperature (whichever is in question of heat response) against the thermostat dial setting. Place the thermocouple of the test instrument on the center of the oven rack. Light the main burner by turning the thermostat to 500°F (260°C). Allow at least 10 minutes for temperatures to stabilize. Check reading against dial setting.
2. If temperature is out of calibration, allow unit to cool until the oven bottom or griddle plate (whichever is being tested) is cool to the touch. Remove oven bottom or griddle plate to expose burner area (Figure.1). (Removal of oven bottom is an optional procedure. Burner flame may also be observed through the oven view port.
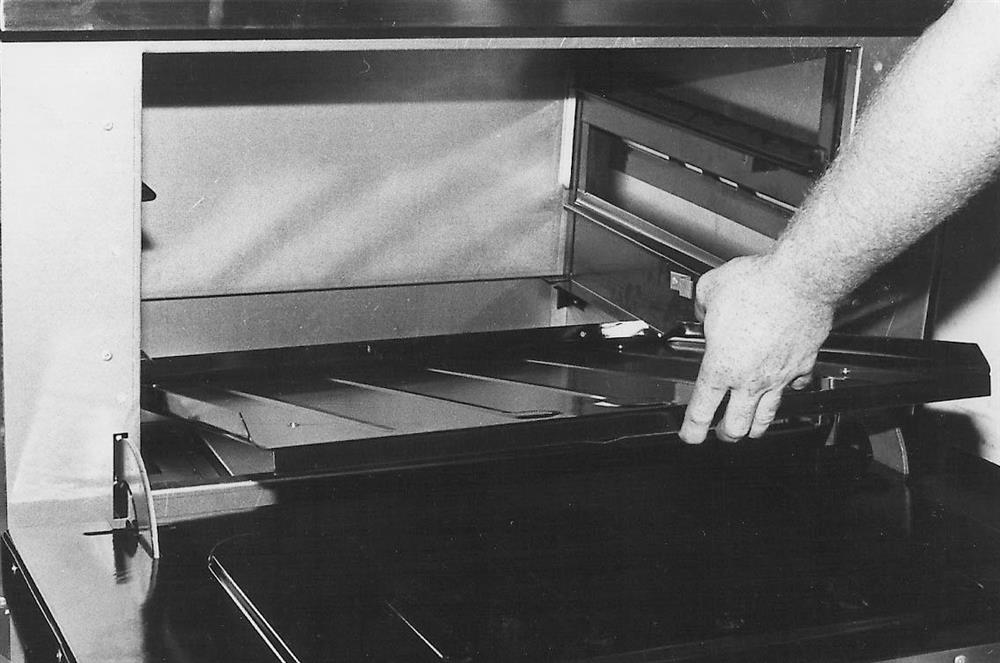 Figure.1
3. Light the burner. Turn the dial to the highest set temperature.
4. After 10 minutes, turn the dial clockwise to the point slightly beyond the first mark on the dial (shown by an “X”).
5. Remove the dial and sleeve (Figure.2).
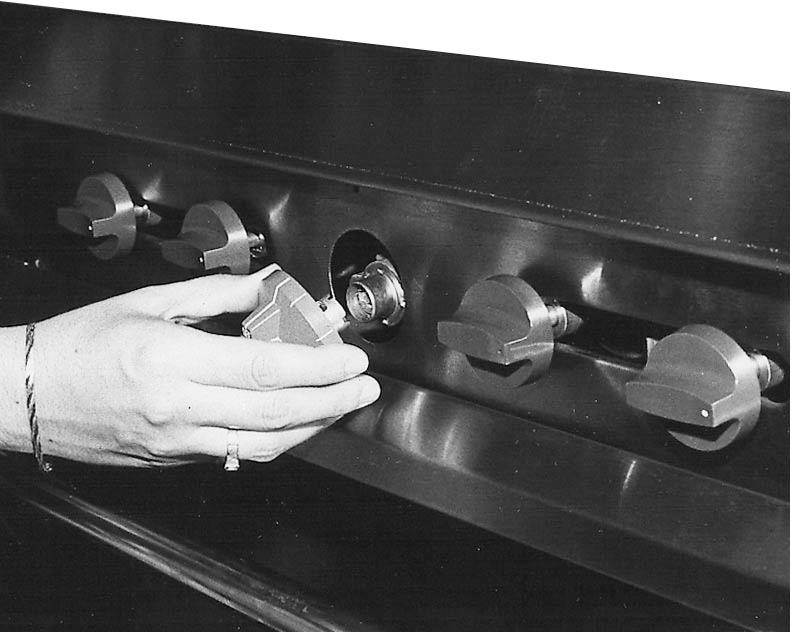 Figure.2
 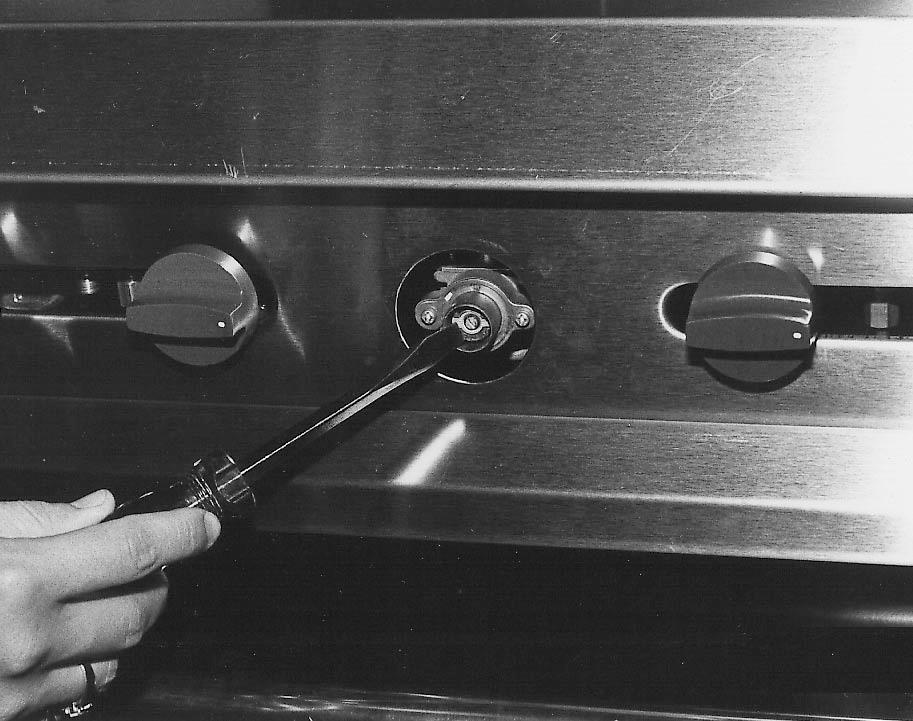 Figure.3
6. With a screwdriver, turn the left-hand bypass adjustor screw counterclockwise to increase the flame, clockwise to decrease it, until the flame appears to be 1 ⁄8" (3.175mm) over the entire burner area (Figure.3).
7. Reinstall the sleeve and dial. Turn the dial clockwise until it locks into the “OFF” position.
8. Reinstall oven bottom or griddle plate.
Temperature Calibration
TOOLS REQUIRED : Thermometer test instrument (not of bi-metal or mercury type), standard flat blade screwdriver.
WARNING : DO NOT USE BI-METAL OR MERCURY THERMOMETERS WHEN TESTING FOOD EQUIPMENT OR PRODUCTS. CHEMICALS WITHIN THESE INSTRUMENTS MAY BE TOXIC IF EXPOSED TO FOOD.
1. Using a test instrument or thermometer, check the oven or griddle temperature (whichever is in question concerning heat response) against the thermostat dial setting.
For Ovens : Place the thermocouple of the test instrument in the center of the oven rack.
For Griddles : Place the thermocouple in the center of each individual griddle section. Each griddle section must be tested.
2. Light the main burner by turning the thermostat to 500°F (260°C).
3. Allow unit to heat until the burner flame is heard cutting “OFF”. Wait about 10 minutes until the burner flame has cycled “ON” and “OFF” several times. Then compare the test instrument reading with the dial setting. If the reading is within ± 15°F (-9.4°C) of the dial setting, its calibration is correct. If reading is not within this temperature window, then recalibrate by performing Steps 4 through 13.
4. Pull the dial straight off the dial shaft.
5. Using a screwdriver placed through the dial shaft, push the metal dial insert out of the dial (Figure.4).
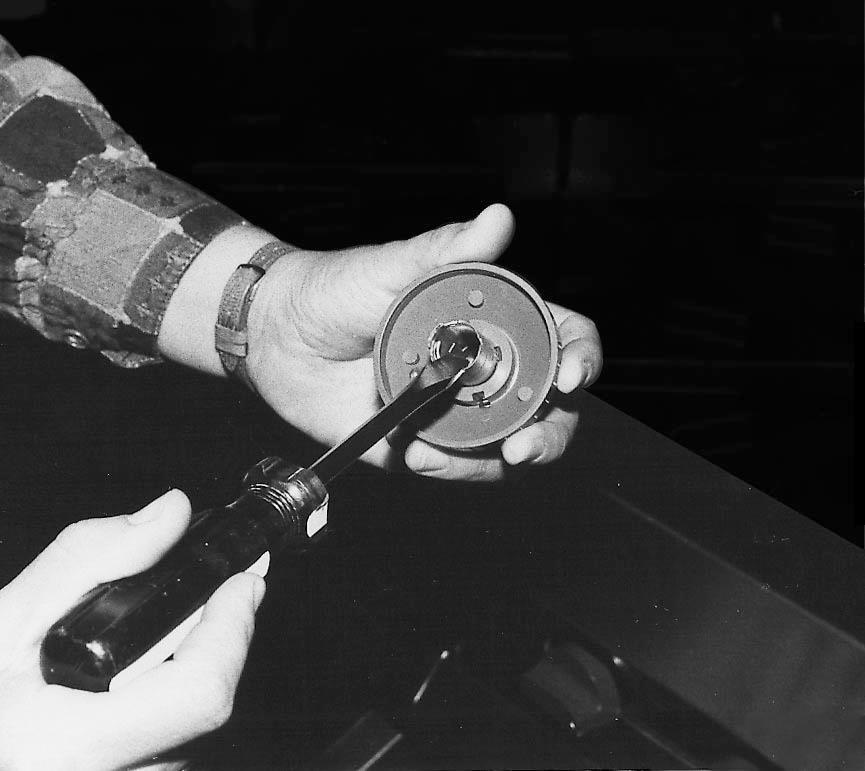 Figure.4
6. Replace the dial back onto the unit. Turn the dial to the 400°F (204.4°C) mark and light the oven burner.
7. After the oven has been on for at least 15 minutes, check the oven temperature.
NOTE : Keep door open only as long as necessary to obtain the reading.
8. Continue to monitor the oven temperature readings every 5 minutes until two successive readings within 5°F (-15°C) of one another are obtained.
9. Check the successive reading against the thermostat dial. If the reading is within ± 15°F (-9.4°C) of the dial setting, the thermostat calibration is correct. If the reading is incorrect, the thermostat must be recalibrated.
10. To recalibrate, hold the thermostat dial in place. Insert screwdriver into dial shaft to engage the calibration stem adjustment screw (Figure.5). Push inward (do not turn stem).
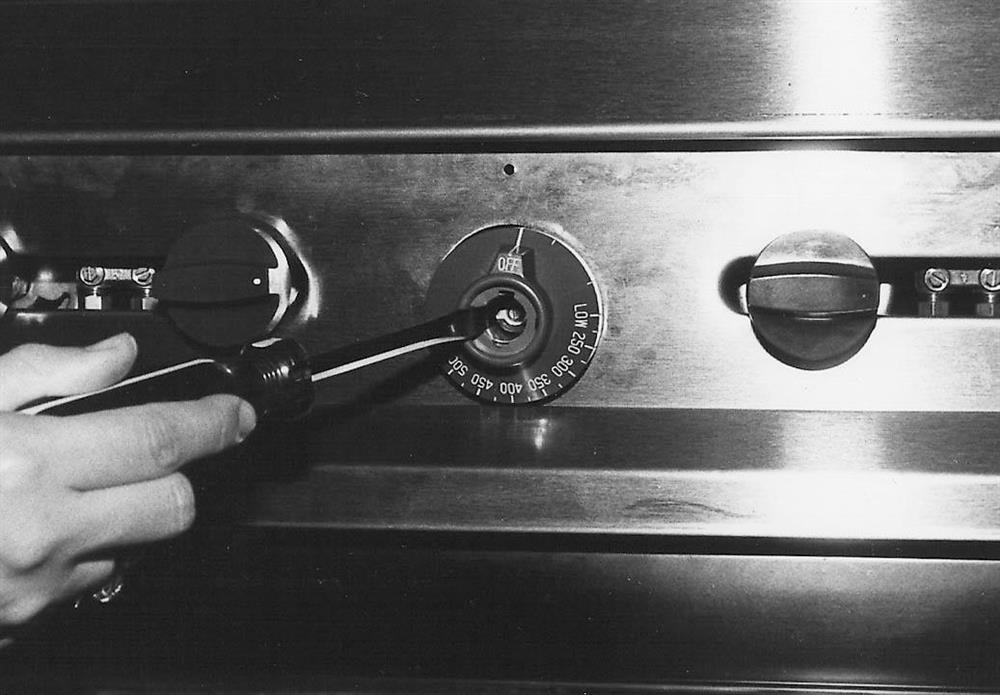 Figure.5
11. While holding stem calibration screw in place, turn thermostat dial until it is set on the actual temperature shown by the testing device (Figure.6).
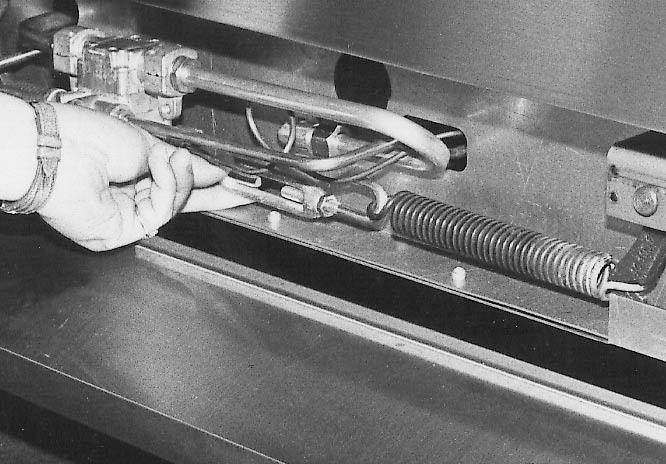 Figure.6
12. Release the calibration screw and reinstall the dial insert.
13. Set the dial to 450°F (232.2°C) and recheck temperature reading as described in Steps 7 through 9. If calibration is not within ± 15°F (-9.4°C) of the dial setting, the thermostat must be replaced.