Say you are new to Traulsen freezer installation and want to try it out but don't have any knowledge. Or, maybe you would like to check the steps to install a Traulsen freezer. We have got you covered. Check out the below steps to complete your Traulsen freezer installation.
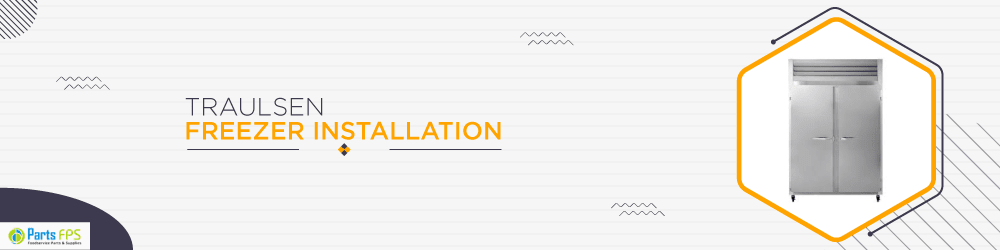
Traulsen Freezer Installation
Traulsen product's all interior fittings have been secured carefully and the casters/ legs are boxed and strapped inside for preventing damage. Door keys will attach to the handle with a nylon strip. Make sure you inspect the unit for damage during delivery.
Location
You should select the proper location that is away from extreme heat areas. Moreover, the area will allow proper clearance for air circulation. You need to allow enough space between the freezer and sidewall in order to make use of the door stay open feature at 120 degrees. The unit's door should be able to open a min. of 90 degrees to make use of the maximum clear door width available.
Shop for Traulsen Freezer Parts at Affordable Prices.
Packaging
Traulsen freezer will be shipped from the factory bolted to a sturdy wooden pallet. And, it is packaged in a durable Styrofoam-backed cardboard wrap.
Most exterior surfaces of stainless steel and aluminum have a protective vinyl covering to prevent scratches during manufacturing, shipping, and installation. So, you need to remove and discard the covering from all surfaces once you have installed the unit in place of service.
It is suggested that the cabinet remain bolted to the pallet during all transportation to the point of the final installation. To remove the wooden pallet, use a 3/4" socket wrench for removing bolts.
Ensure that the unit doesn't lay on its front, side, or, back for removal of the pallet.
Casters or Legs Installation
You will get a set of 4 six-inch high casters and 16 bolts with your Traulsen G series refrigerator/ freezer. These casters and bolts are shipped from the factory picked inside a cardboard box which is strapped inside the cabinet to the lower shelf.
- Legs will be supplied as an optional accessory kit. Four legs and 16 bolts are shipped inside a separate cardboard box.
- While installing the legs or casters, first raise and block the reach-in a minimum of 7 inches from the floor.
- For installing legs, thread the legs into the threaded holes on the bottom of the cabinet.
- Be certain that all legs are tightly secured. When the unit is set in its final position, it's important that the unit be leveled for proper operation.
- The legs are adjustable for this purpose, turn the bottom of each leg counterclockwise to raise it, clockwise to lower it. Level the freezer from front to back as well as side to side in this manner.
Note that the Traulsen freezer or refrigerator is not designed to be moved while on legs. If you want to move the unit, use a pallet jack or forklift to prevent damage.
To install casters, there is a requirement of using 4 bolts each to secure them firmly to the cabinet bottom at each corner. The caster bolts are tightened using a half-inch socket wrench.
Traulsen Freezer/ Refrigerator Replacement Parts Available @ PartsFPS.
Shelf Pins
The freezer is supplied with shelves and shelf pins. You have to check all these shelf pins to assure they are tightened down as they may have come loose during shipping. Rotate the pins clockwise until they are secured against the side of the cabinet.
Remove the Doors and Hardware
In order to fit through narrow doorways, it is necessary to remove the door and hinges. Start by removing the plug at the bottom of the top hinge to remove any solid door. You can see a small screw inside the hinge which secures the door in place. Remove it with a flat head screwdriver and then the door can be lifted off the hinges.
After removing the door, you need to remove the hinge assembly and hardware from the door itself.
If it is necessary to remove the hinge hardware from the cabinet, start with removing the three Phillips head screws which hold it in place. You have to set these components for later assembly.
Remove the lock keeper in order to reduce the overall cabinet depth to 32 degrees. By removing the 2 flat head screws which secure the lock keeper bracket in place, you can remove the lock keeper bracket.
While re-installing the door and hinges, you have to follow the reverse procedure.
Order Online OEM and Genuine Traulsen Parts for Freezer.
Power Supply
The supply voltage must be checked before connection to be certain that proper voltage for the cabinet wiring is available. Make the connections according to the local electrical codes. Size wiring to handle indicated load and it's necessary to provide an overcurrent protector in the circuit.
Install Optional Interior Kits
Additionally, you may get shelves or tray slides along with the main unit. To install these shelves, first, you have to remove the white plastic covers from inside the cabinet. You can locate these in the same vertical line as the pins already in place on the interior sidewalls, back and center mullion. Position the new shelves and then insert the gray plastic shelf pins into these holes and tighten them by turning clockwise with your fingers. After all, pins are placed, the new one should be placed to test on top of them.
To install optional tray slides, you need to follow the directions packaged inside the kit carton.
Conclusion
We hope this guide on Traulsen freezer installation helped you to simplify your job. For further more assistance, refer to the manufacturer’s manual. Some models may have specific instructions that you should follow. Stay in touch with us to get more kitchen equipment installation procedures.
About the Author
Haritha is a Content Writer at PartsFPS. She has a great understanding of today's marketing strategies that yield strong results and always happy to create valuable content & share her thoughts.
She was good at writing content for E-Commerce websites related to Restaurant Equipment Parts, Appliance Parts, Food Service Parts, HVAC Parts, etc.
You can see some her contributions at PartsXP.com, PartsAPS.com, PartsIPS.com